Instagram is an online photo and video sharing social media platform. Although it is not very old in age but still has become very popular around the world. Sharing a photo through Instagram apps and web platform is very easy but some people face a lot of problem while sharing a photo or a video in a WordPress site. If you own a WordPress website then you must be thinking about the process to embed Instagram photos and galleries to your blogs. This problem has come to an end. Actually the Instagram authority released an API for users to integrate photos to their own websites and blogs. So need of worrying anymore as in this article we have guided through step by step guideline which will be helpful to both beginners and advance WordPress users. So let’s jump into the tutorial without wasting any more time.
Step-1: Installing the Enjoy Instagram WordPress Plug-in
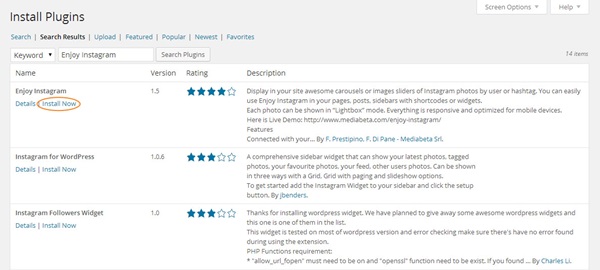
At first you will have to install the Instagram WordPress Plug-in in your WordPress website. Go to Plugins >Add New option and search there in the list for ‘Enjoy Instagram’ WordPress plugin.
Now click on the ‘Install Now’ button and then ‘Activate Plug-in’ button to activate the plugin.
Step-2: Registering Application using Instagram API:
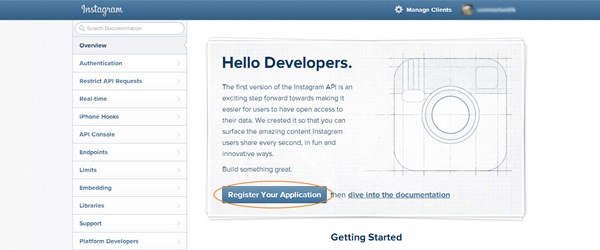
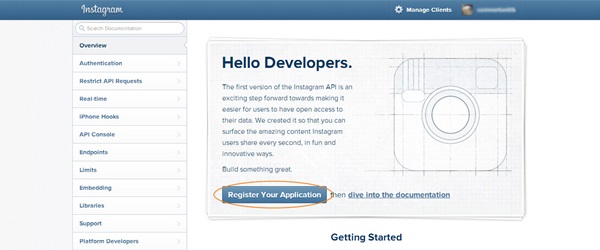
After the installation process is over you will have to register on Instagram to use its API. So log-in to your Instagram account and then go to this URL http://instagram.com/developer/
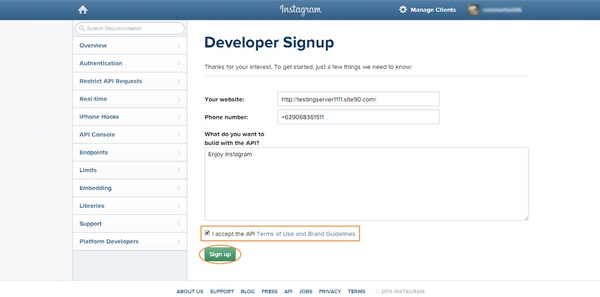
After opening the URL click there on “Register your Application” Button. Next you will be redirected to the ‘Developer Sign-up’ Page. There fill up all the fields with your information like Website URL, Phone number and what do you want to build with the API. Next, tick the agreement checkbox and at last click on ‘Sign-up’ button.
Step-3: Registering a New Client
Now you have registered your API and next you will have to create a new client to get the API Client ID and Client Secret ID. To proceed with this step again you will have to open this URL http://instagram.com/developer/.
Again you will have click on “Register your Application” button there.
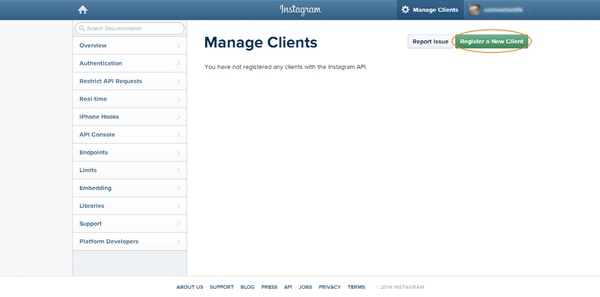
Next click on “Register a New Client” button at the top right corner of the page.
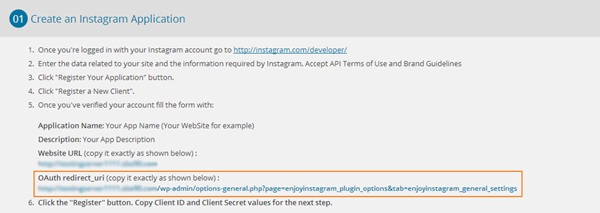
You will be now prompted with “Register a new Client ID” page in which you will have to fill up the necessary fields of the form and enter the Captcha details below before clicking on the ‘Register’ Button.
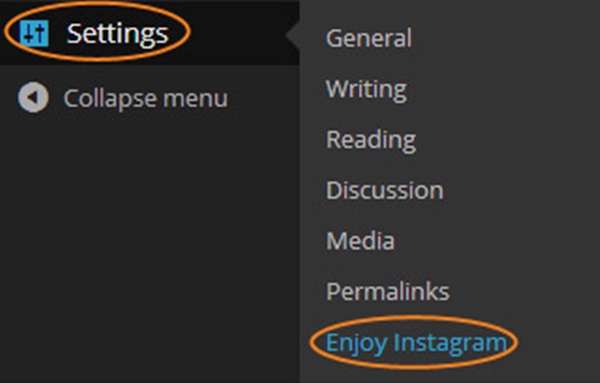
Please note that you will be getting the OAuth redirect_uri by going to the plugin settings page on your WordPress Admin Panel. To do this go to Settings > Enjoy Instagram and copy the OAuth redirect_uri provided for your website.
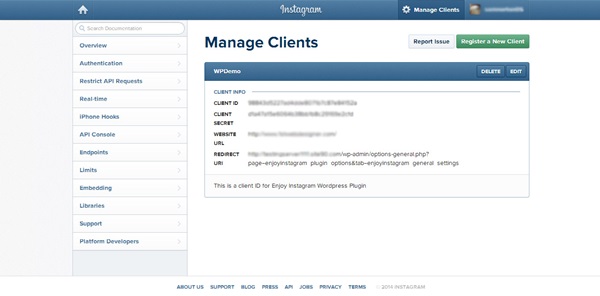
After clicking the button you will be redirected to the “Manage Clients” page which will contain your Client ID and Client Secret ID for your WordPress Site.
Step-4: Copying Client ID and Client Secret ID to the WP site
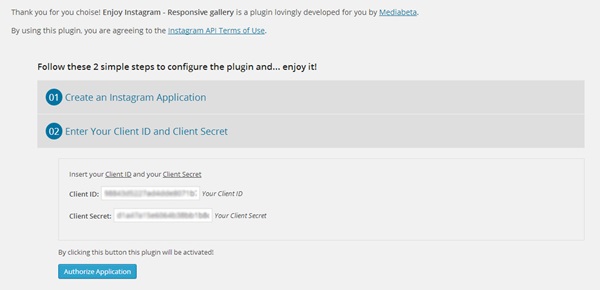
Copy the Client ID and Client Secret ID from the previous Manage Clients Page and then paste it on the respective fields on the authorization page.
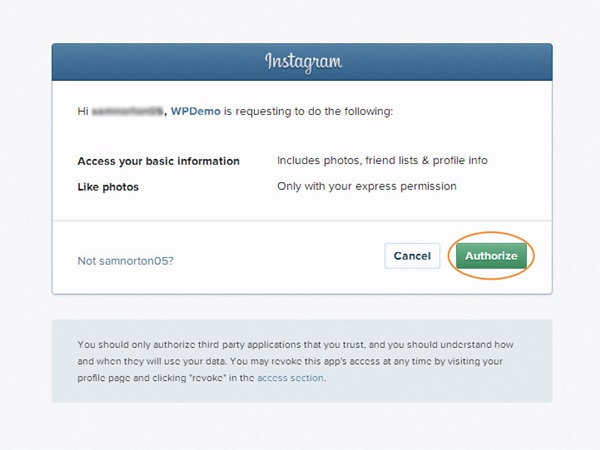
Finally click on the “Authorize Application” button to save it. Next you will be redirected automatically to the Instagram’s API access page. Click on “Authorize” button there.
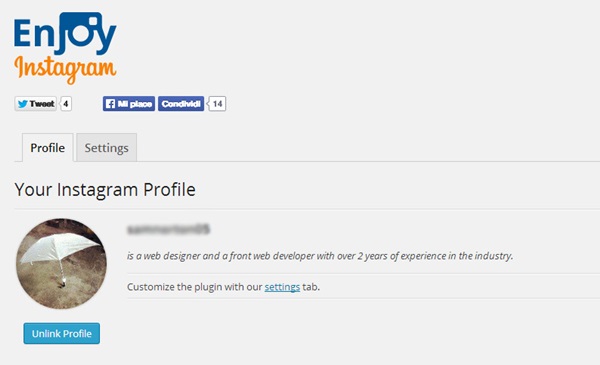
After finishing you will then taken to the plug-in success page on your WordPress site which will indicate you that the plug-in has been installed successfully.
Step-5: Creating Widgets to Display Instagram Photos on the WP site
So after the installation process is over, now you will have to display the Instagram photos on the sidebar with the help of widgets.
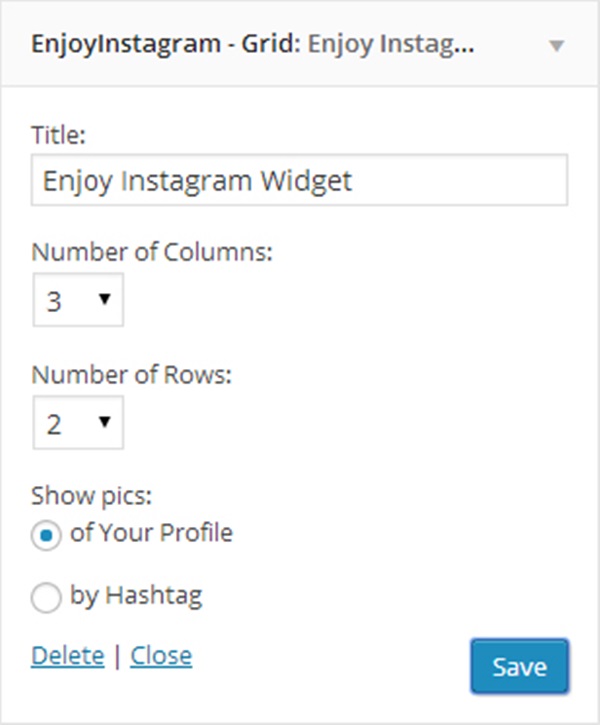
Go to Appearance > Widgets and add the “Enjoy Instagram Grid Widgets” on the main sidebar and configure it to your preferred settings.
Now check your front page and you will see that the Instagram’s photos are displayed on the sidebar.
Additional Option: Displaying Instagram Photos via Hashtags
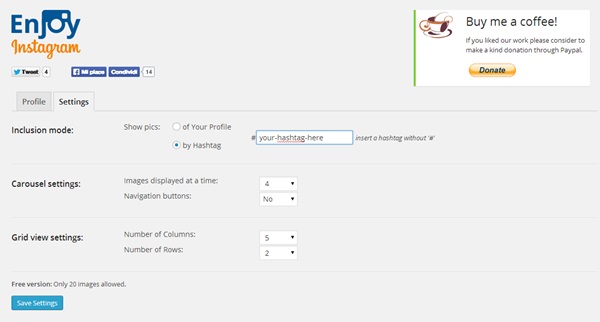
If you want to display photos using hash tags instead of your own photos then go through this process. Navigate on the Enjoy Instagram Settings page under “Settings” tab. Now just click on the Hash tag Radio Button and enter the hash tag you want to display.
No enjoy the Instagram plug-in that will allow you to display your images in your website. So what else do you need? You are completed with the whole installation process. Enjoy your Instagram pictures on your website right from now on.

